Cardigan Refashion: How to Add Lace Trim

By Mariana Kirova
This article explains the design elements and details for a casual cardigan refashion with lace I've done lately. You'll find pictures of the materials I've used, the design features and the embellishment technique used in the project.
If you wish to save the pictorial or to keep it for later, hit the Pinterest button above and save to your account.

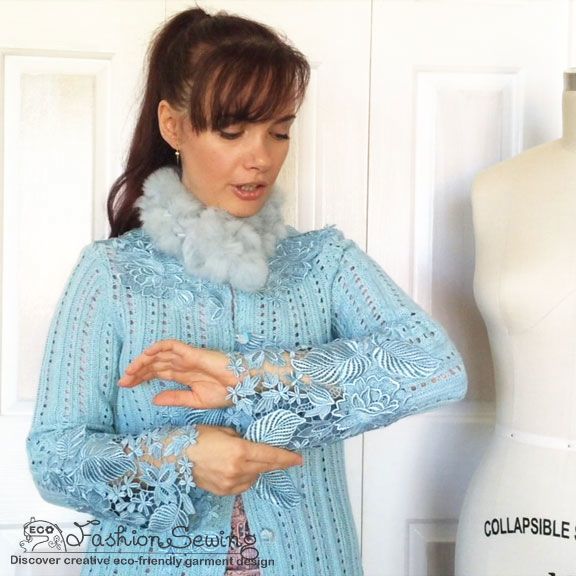
The Cardigan Refashion Look "After"
I found this beautiful colour cardigan when was thrifting in a local charity shop. In my stash with materials gathered for some time, I found a perfectly matching lace. Design wise I decided to enhanced the casual look of the cardy by adding lace applique, buttons and loops as a closure and a detachable fur collar.


The Look "Before"
I was drawn from the colour and the texture of this casual three quarter sleeve cardigan, acrylic sweater material, when I was hunting for materials in a local charity shop.
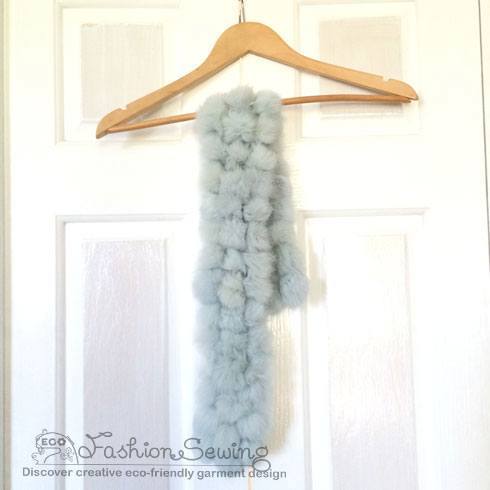
As I usually do, while still in the shop I looked around for colour matching materials or accessories. That's how I found the rabbit fur scarf (in fact I found four of those in different colours, I was lucky that day!).

The Materials
As you know from my story, I used to work in bridal and lace has special place in my heart since. To source raw materials I usually go thrifting from local charity shops, look for garage sales for second hand treasures, or chat with friends and neighbours if they have unwanted materials or know someone who might have. The lace I used in this redo though I sourced from a local designer who was selling her materials. Some designers do that before closing their business and during last couple of years, unfortunately, very talented and some well known fashion designers from Perth needed to do so.
If you're upcycling lace T-shirt, check this article for more insights and cool ways to add lace embellishment and trim.


Buttons I took from another thrift find that was waiting for a while.
The matching blue satin ribbon came from my box with vintage laces and ribbons, bought some time back from a friend's sister who used to sew bridal accessories and gowns in the '80s and '90s, I think.
The ribbon was used to make loops for the closure.
TIP: Use stash materials to find clothes to refashion
If you love creating you might already have an amazing stash full with all sorts of things.
It is a good idea to collect preferable colours & textures so to have good variety when get to the creating phase. Some might be lucky with vintage treasures or a heirloom of textiles and notions from their mother or grandmother. Others might keep bags with remnants and leftovers from past projects.
Whatever your material, you can cut a piece of it and take it to the local charity store. There find the best colour matching garment and play with ideas how to redesign in better way. Doing it in the op-shops gives you a good chance and lots of choice to find your raw garment while using what is already in your stash.
The Technique
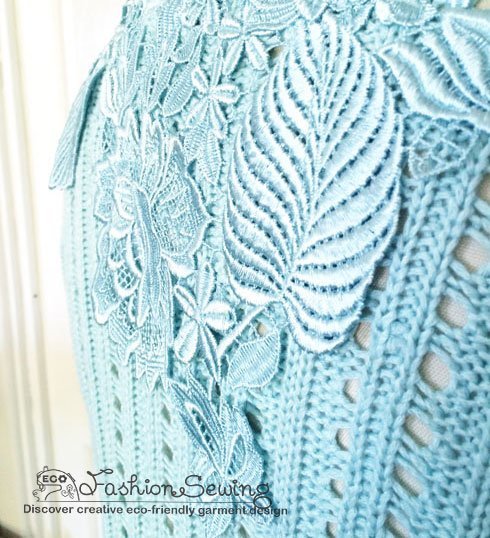
The main sewing technique to do this cardigan refashion with lace is lace applique (also appliqué). It has lots of uses, often used in bridal for wedding dresses or special occasion wear.
In this case I used special type of lace material which can be cut without causing the lace to fray. Hence, the fabulous special cut-away lace look.
Another great thing of that lace is you can stitch smaller elements of the lace without spoiling the look. Which also means almost nothing is wasted.


Stitched lace at the back
When sewing lace applique the lace is top stitched onto the garment. Usually (and easier) with free-motion sewing (like the free-motion quilting).
However, it can be done with a normal foot & straight stitch (plain stitch) sewing machine, industrial or domestic. You just lift up the foot and change the direction whenever is needed so the lace is stitched in place.
To retain the stretch of the material at the back and the shoulders, I attached the lace only on some places, not entirely. This won't cause pulling when the garment is worn (see the picture of the back).
It sounds easy, yet still needs a bit of practice. Particularly with fine materials or with knit fabrics, as it was the case with the bulky material of this cardigan. For those who have some more experience, to sew the lace on the cardigan I loosened the tension between the presser foot and the feed dogs, explained also in the Zero Waste tutorial under the Tip: Adjust the tension settings on your sewing machine. This way the cardigan didn't pucker, however, the material needed constant adjustments, so the lace to be sewn on the right position (I don't like basting, so I didn't tacked the lace in before sewing; used only pins - thus, more adjustments while sewing).
You can see the details of the stitching on some of the following pictures showing the right side (outside) and wrong side (inside) of the cardy. Is showing in the pics of the buttons & loops closure below, for example.
Back detail
Front detail

Sleeve detail

Hem detail
Buttons & Loops Closure

Neckline, buttons & loops details
The buttons I took from another blue shirt, they have slightly different shade, yet good fit for the cardigan.
For the loops I used regular satin ribbon which I folded in three layers along the length and stitched. It is not the regular rouleau ['ru:loh] loops cord you could do for this kind of closure.
However, in this refashion the main criteria for me was to find the best possible colour match. So, the light blue ribbon from my stash was exactly what I was looking for.
The loops were stitched on top of the inside edge.
So, to keep the good look of all finishes (sorry, I just wouldn't stand any fluffy or ugly finish, but that's just me;) on top of the loops inside I added some small details from the lace. Those details were appliqued the same way as the other lace.
Where there wasn't lace applique on the outside, though, I opened the closure band/facing and stitched only on the band. Just after that I stitched a little bit, catching both the outside layer and the inside band (Sometimes I could be too particular, so feel free to skip those minuscule detailing).
By doing this I prevented more stitching to reveal on the right side of the cardy and keep the look clean.

Close look inside: the loops' ends covered with small lace elements
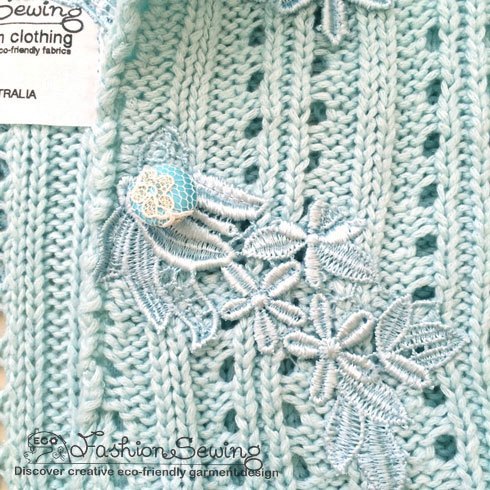
The Eco Fashion Sewing Label

When attaching my Eco Fashion Sewing label I added a lace flower - more beauty on the inside :)
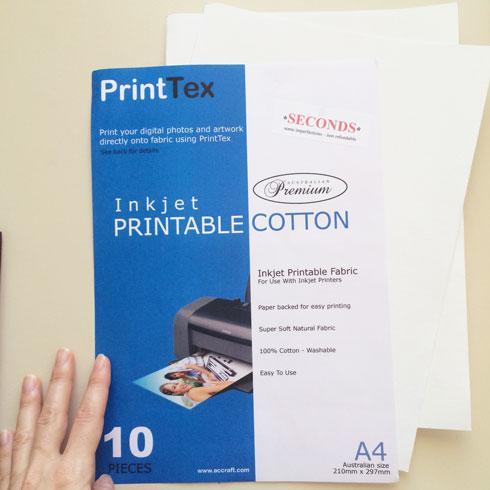
The inkjet printable A4 fabric sheets I use to print the EFS labels
The label is printed on the inkjet printable fabric that I stashed from a craft fair years ago. You can find this or similar printable material in the craft sections of your textile retailer. Just check if you have laser or ink printer. These are for inkjet printers.
I've heard there is a way to print on a fabric and set the ink with vinegar solution, yet I have to research for this to find how exactly can be done.
Adding Detachable Fur Collar-scarf
To add more versatility to this cardigan refashion I made a detachable fur collar from the thrifted rabbit fur scarf.

The loops and the buttons stay inside the neckline hidden by the fluffy fur

Loops on the garment & buttons on the collar give alternative look for this cardigan refashion
The Versatile Look
The cardie with the fur collar


The cardie without the fur collar
I like the versatility of the detachable collar. Whit the collar, the cardigan looks great to put on and go out for a chill day or night out. But without the collar, the cardie could be a top part of an outfit and you can easily wear it inside a restaurant or a dinner party.
Frankly, untill now this is my favourite "casual" garment refashion. It has high-end enhanced, beautiful unique final look. I also like the material - it is warm and very soft, let alone the lovely icy blue colour.

Make sure you watch the video how to make the removable fur collar. No sewing machine required, all done by hand. By adding a detachable collar you could enchant with a bit of more glamor with some of yours otherwise unused fur or textile scarves.
I'm curious to know what is your experience with lace and using it to enhance your garments. Let me know in the comments below. Thanks!
Happy refashion adventures,
Mariana ;)
Mariana, it’s a beautiful refashion. It looks lovely on you too. Very stylish and detailed. I love all your tips and appreciate you sharing your design expertise.
Thank you for the kind words, RUDE Girl;) Great to hear you like it.
So beautiful, Mariana! I’m not sure what I love most … the lace, buttons, collar. It’s simply gorgeous. Nicely done!
Thank you, Joy!
It really turned out unexpectedly good.
Nice to see you here;) Love your tweets and support!
Mariana
I do not where to begin….this beautiful romantic delicate embellished gorgeous cardigan has be given new life…..SUPERB craftsmanship, thanks for sharing
Sandra, thank you for that!
It’s so great to see you on the blog;)
Have a lovely day! (or night, I know your time is opposite to where I am)
Mariana
Wow ! What a gorgeous cardigan! You did a fantastic job. I’m really impressed, I want to use these technique. I love the cardigan, esp your choice of lace on this one. Thank you for great tips!
I’m positive you can do it, Eli cat;) You are great with your projects!
Thank you for your comment today!
Mariana
Beautiful, Mariana. The lace detail totally transforms the top.
Yes, I found some good looking and good quality finds can be used to enhance the look quite well. Thanks, Pam;)
[…] used a thrifted cardi and beautiful lace material I sourced from a local designer’s leftovers (I love […]
Genia!!!! Me encanta.
Thanks, Clau.
Soooo love this… Great idea and great job!!!
I’m glad you like it, Chris. :)
Wow,I love this sweater! I’m wanting to start my own line of fashion sweaters. I love your design choice. Thanks I have granddaughters that would love to have their own personal sweaters for Christmas this year..
That is wonderful, Sharon!
You are blessed with your granddaughters. I imagine what a great time you’ll have with them making the sweaters for Christmas. Love your comment.
Cheers, Mariana
I love your work. I am currently working on upcycling a black lace t-shirt into a cardigan and trying to find out how to add a lace trim to the front opening, which is how I came across your ideas.
Lace and T-shirt sounds like a heaven project, Fi! Probably there are some tips from this T-shirt Refashion with lace you could use too?
I’d love you to keep me posted, write me via the Contact page here on the website. Have fun!